Homemade Finger Paint AND Finger Paint Printing

DIY Finger Paint

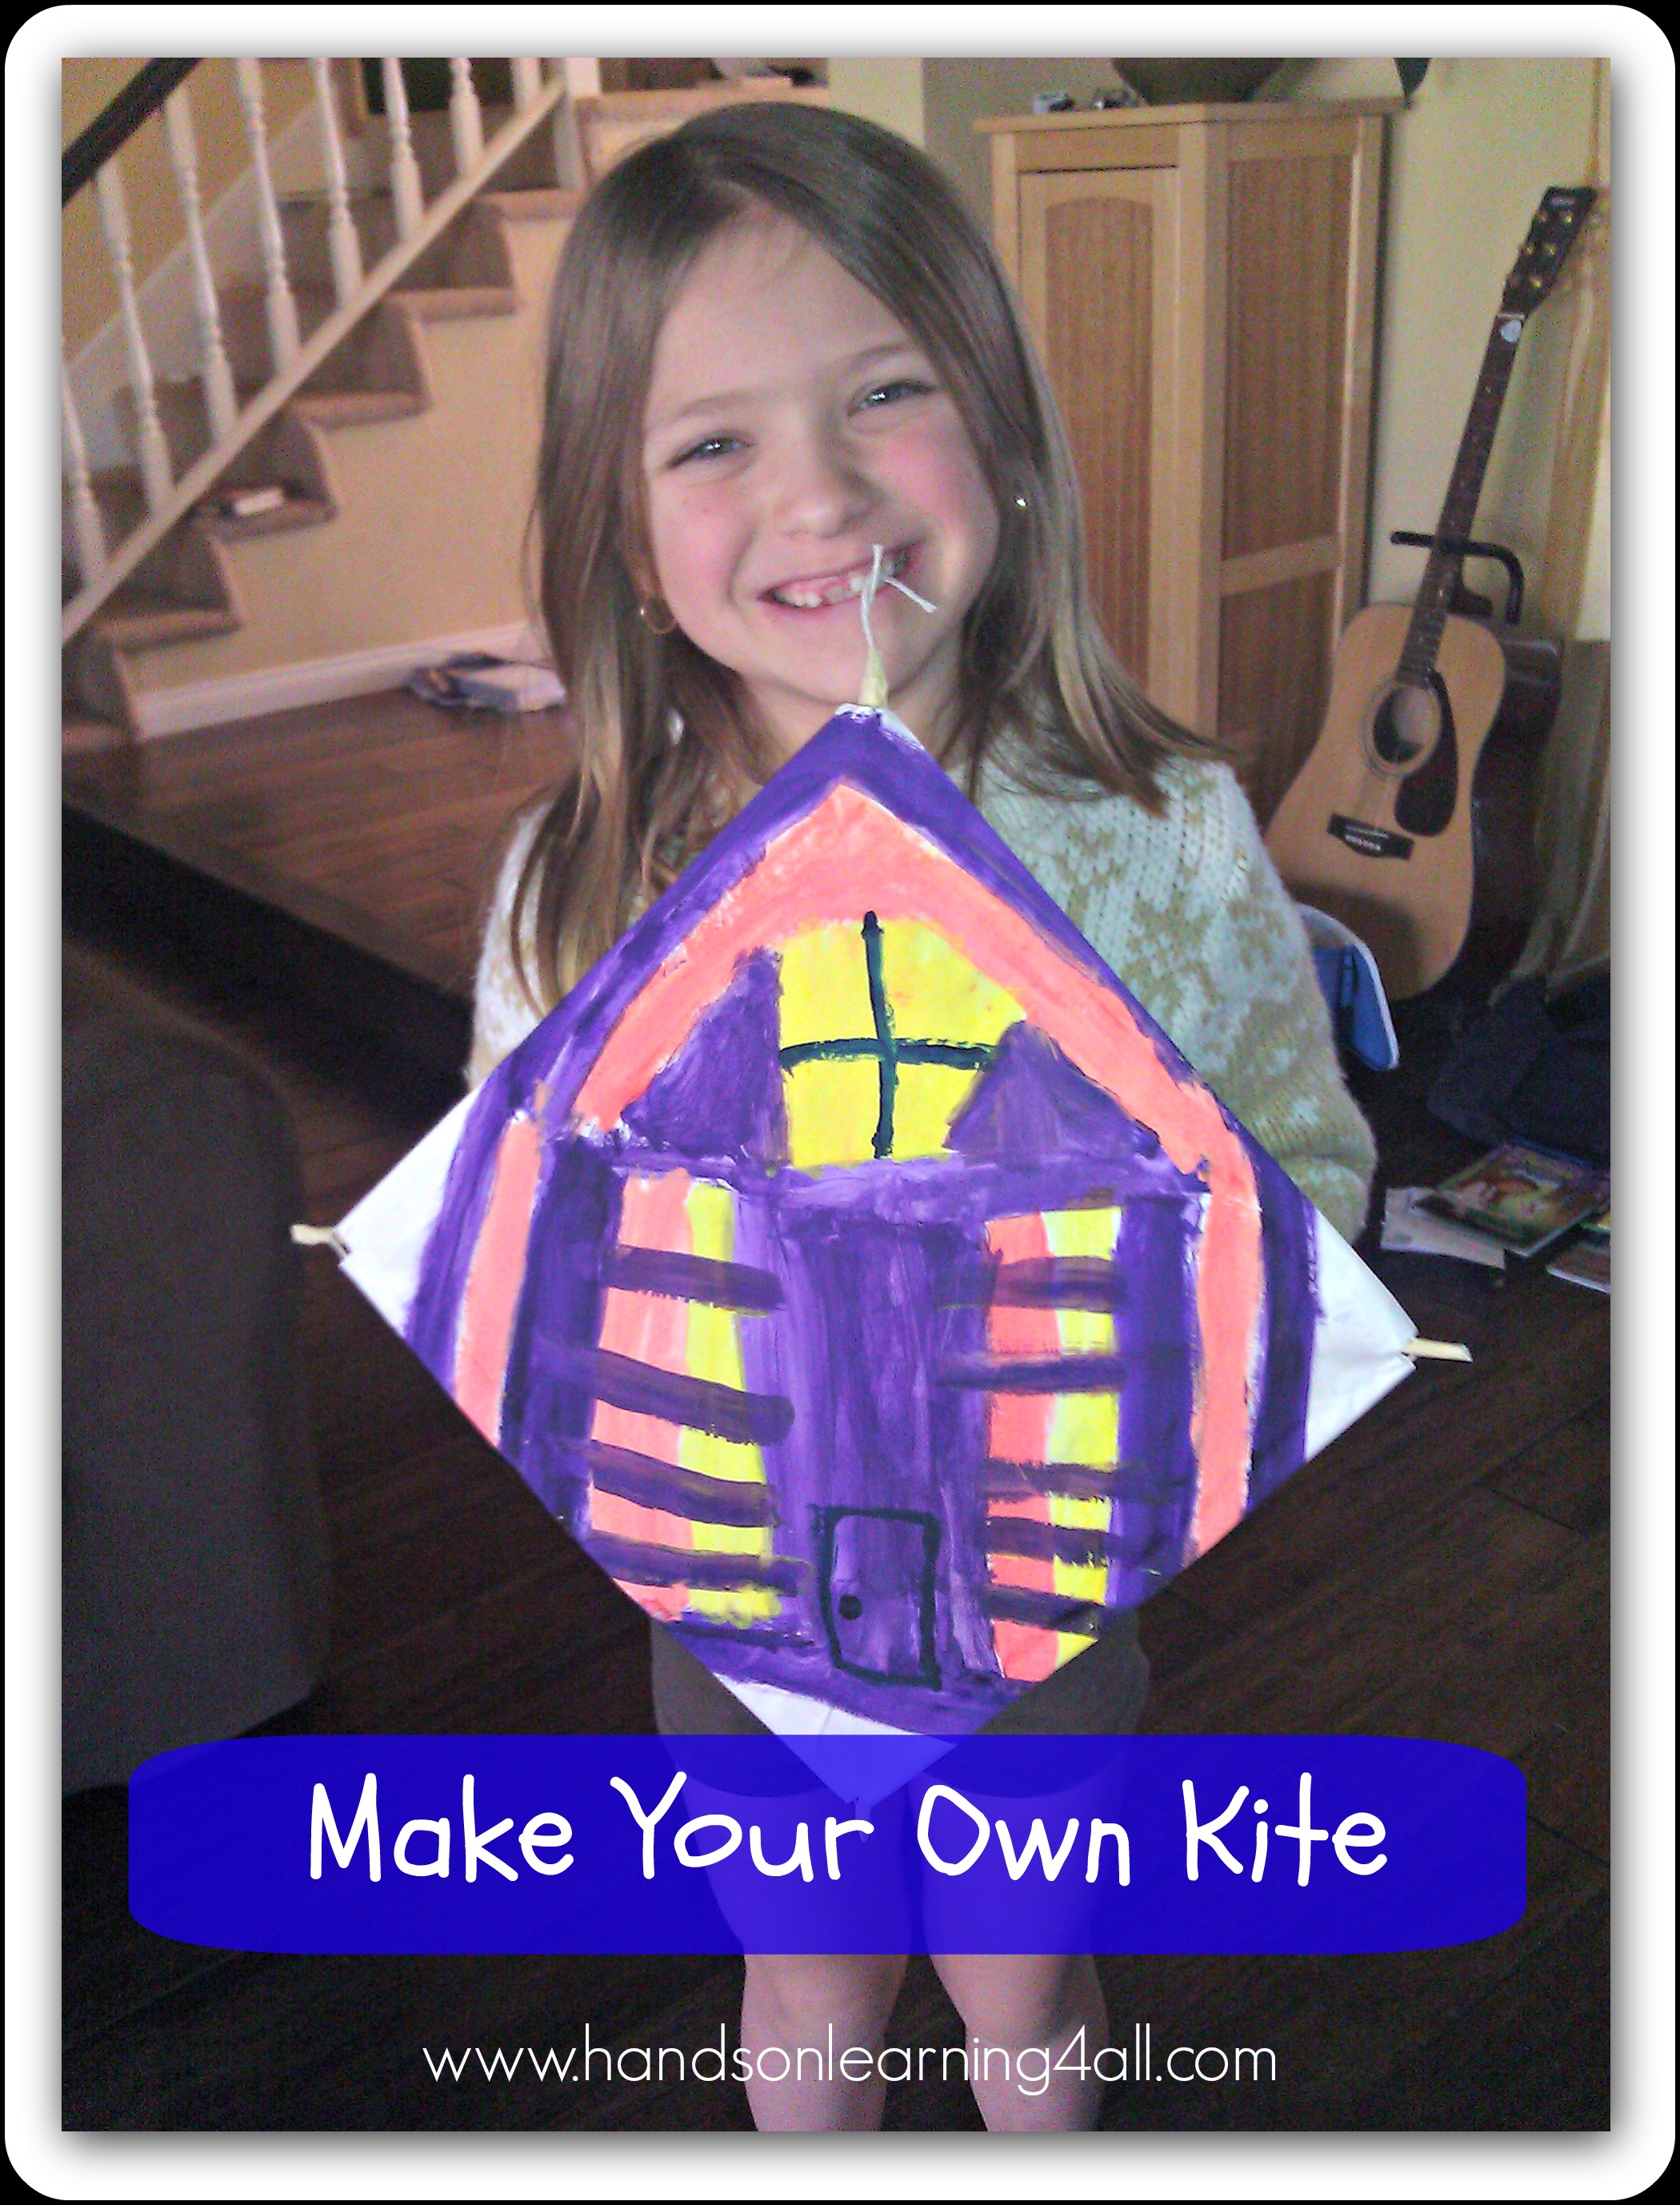
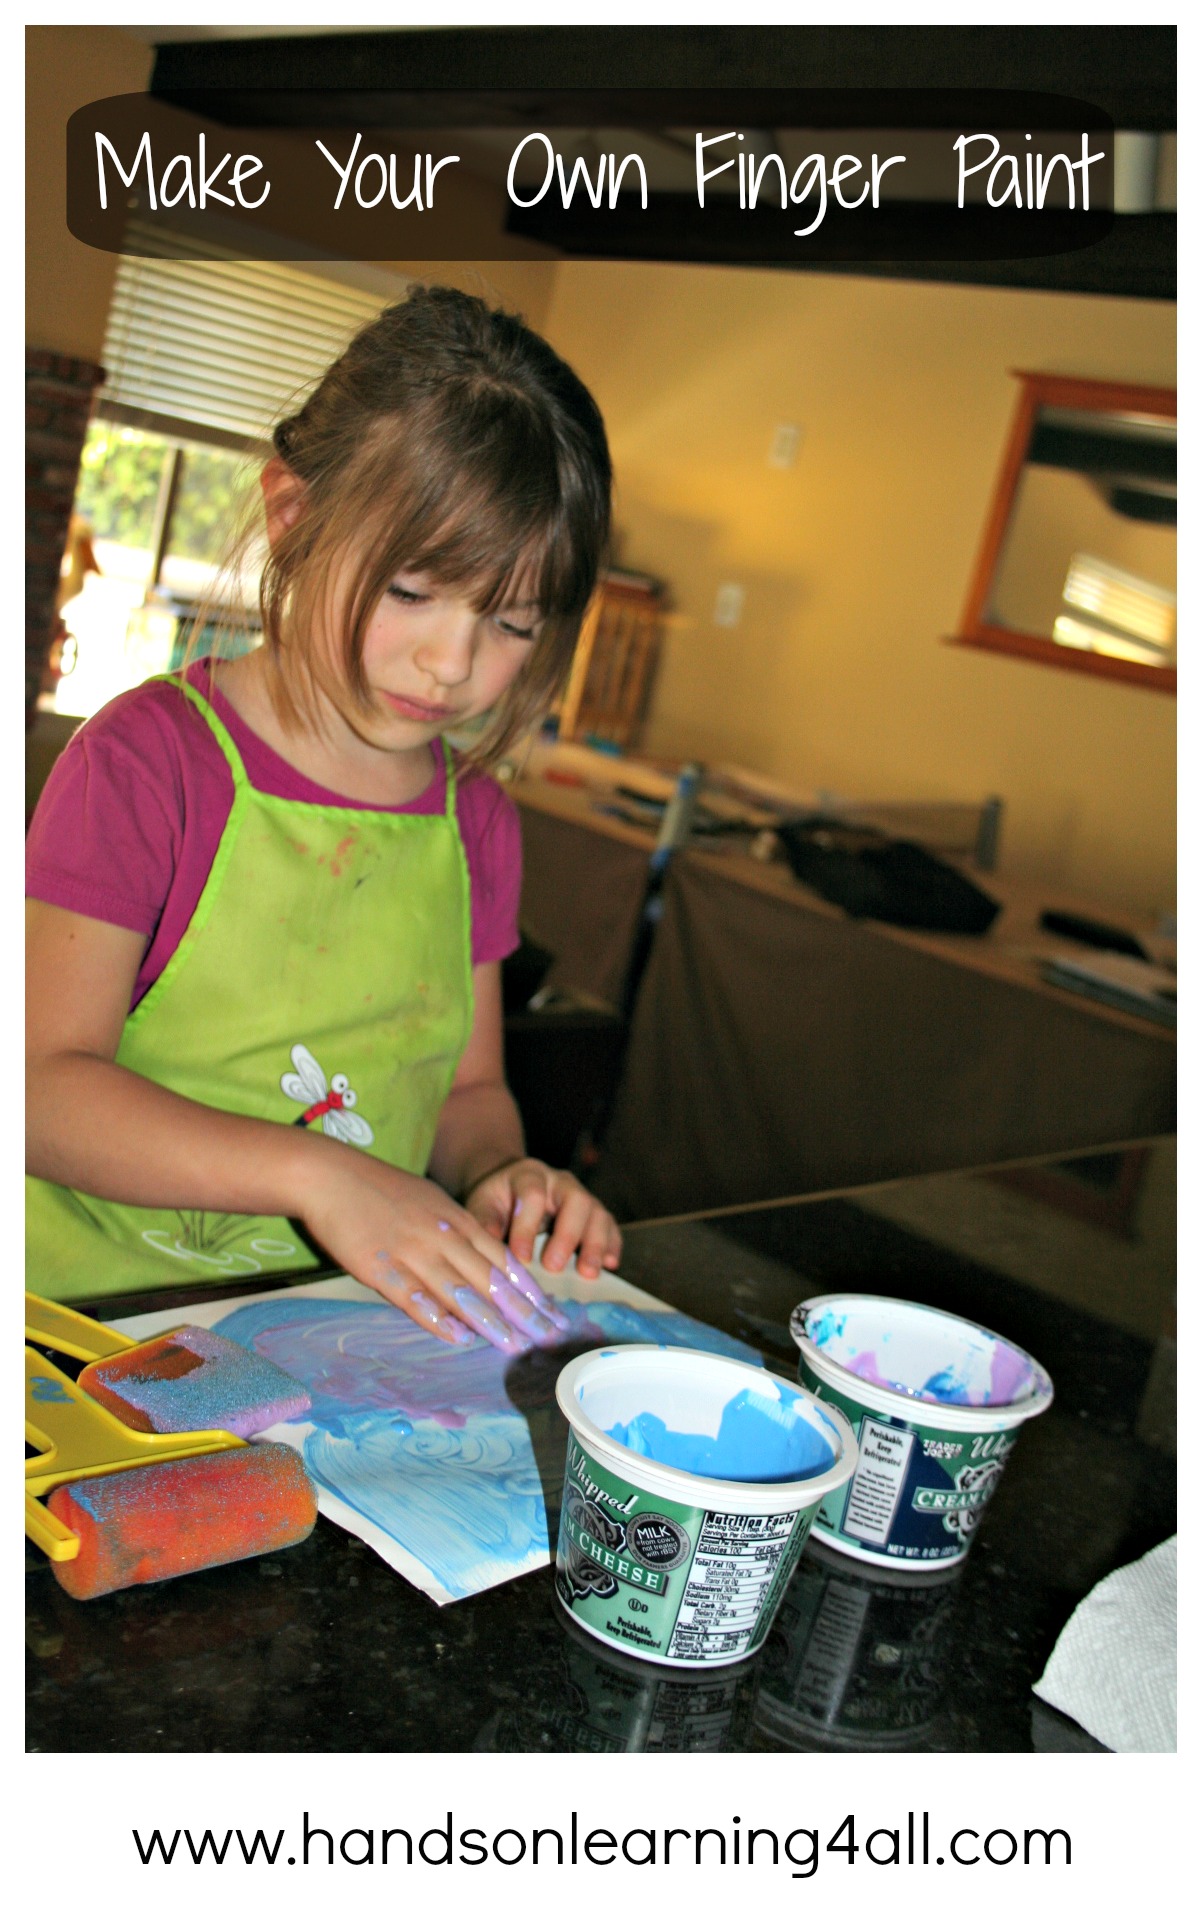
My daughter wanted to do some finger painting and we were fresh out of finger paint. So I whipped together this recipe that ‘slips’ just like finger paint does beneath the fingers.

Materials:
1 tsp of dish soap
2 tbs of tempera paint

Then I gave her a piece of finger paint paper (high gloss) and let her go. Well, it didn’t take long for her to fill that paper….and the next one….and the next one. AND I noticed that she was just enjoying the texture and the color mixing of the paint and not really painting any particular picture. So the next part of this art project was pretty creative.

Finger Paint Printing

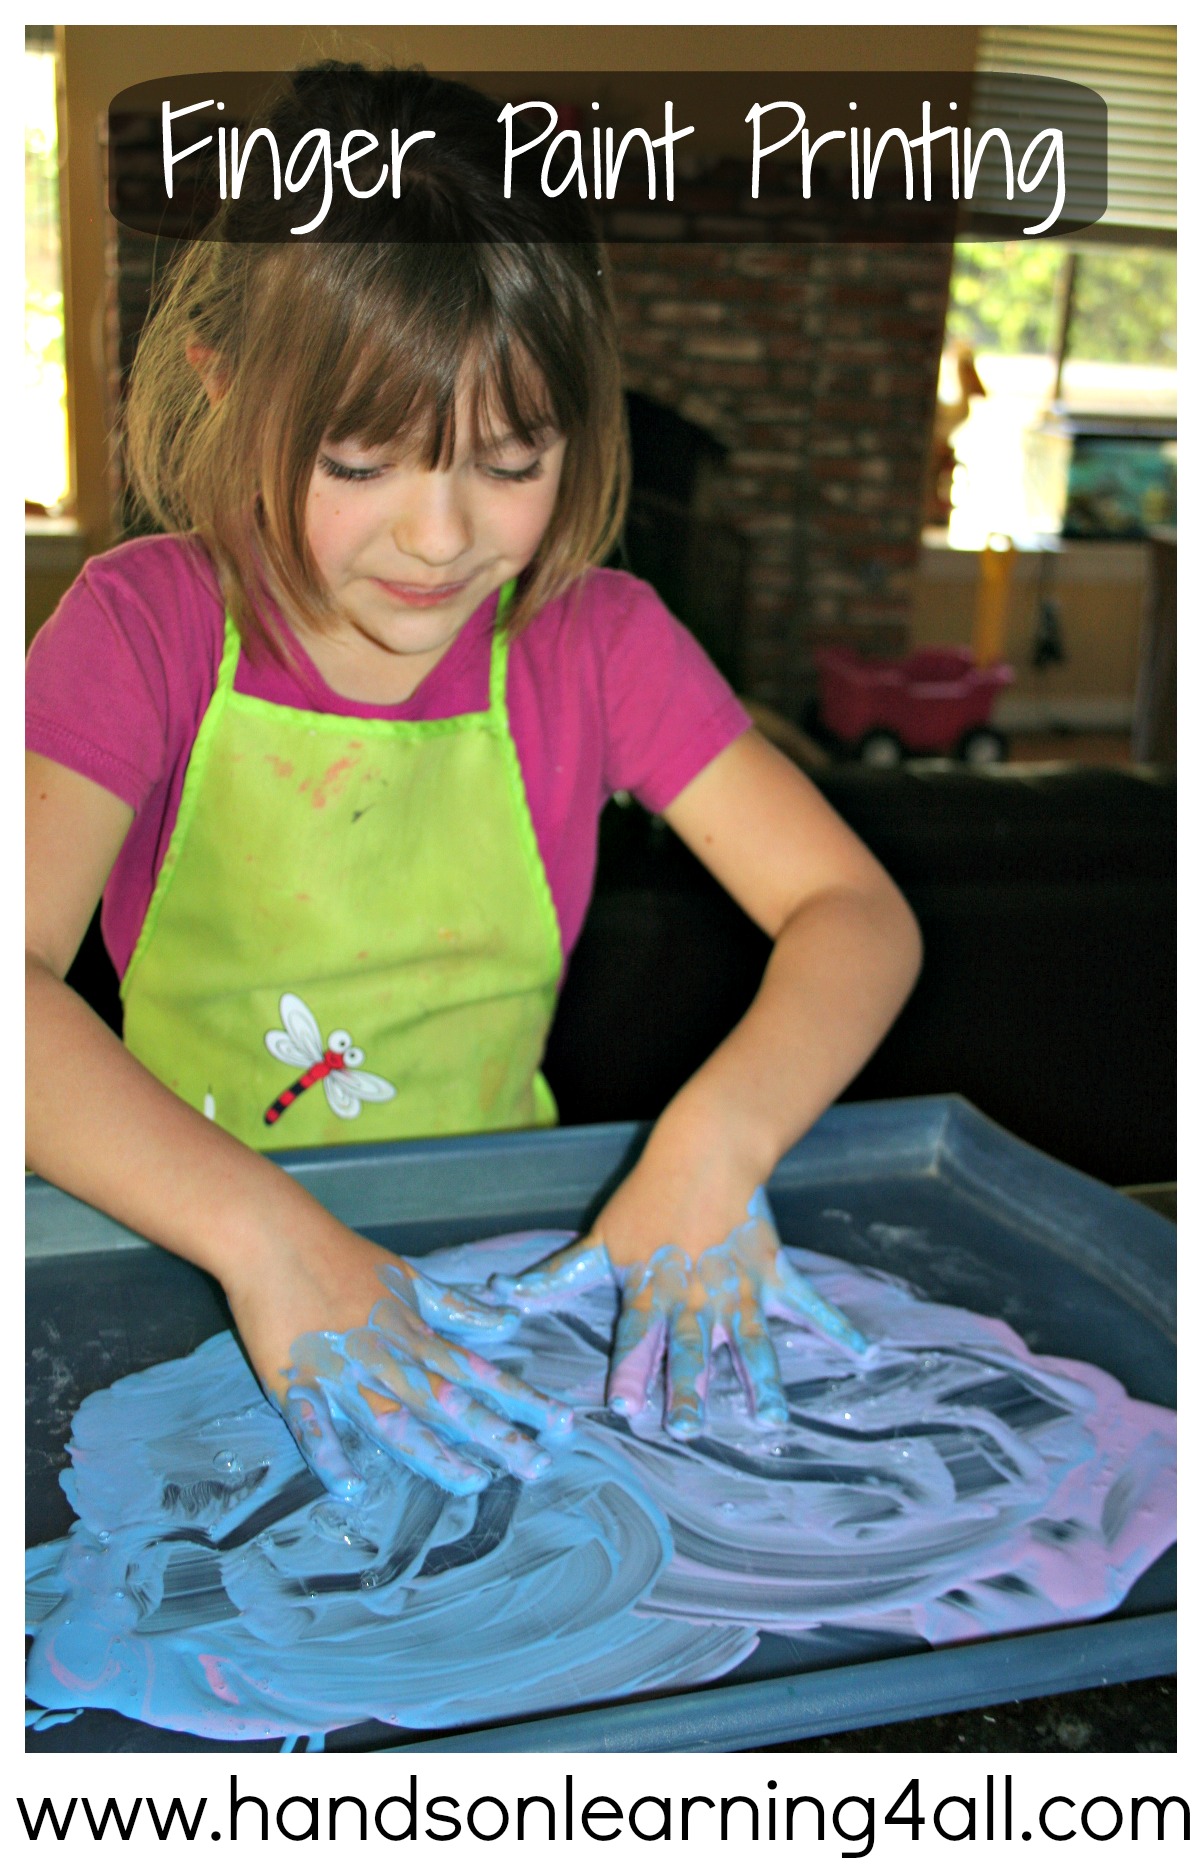
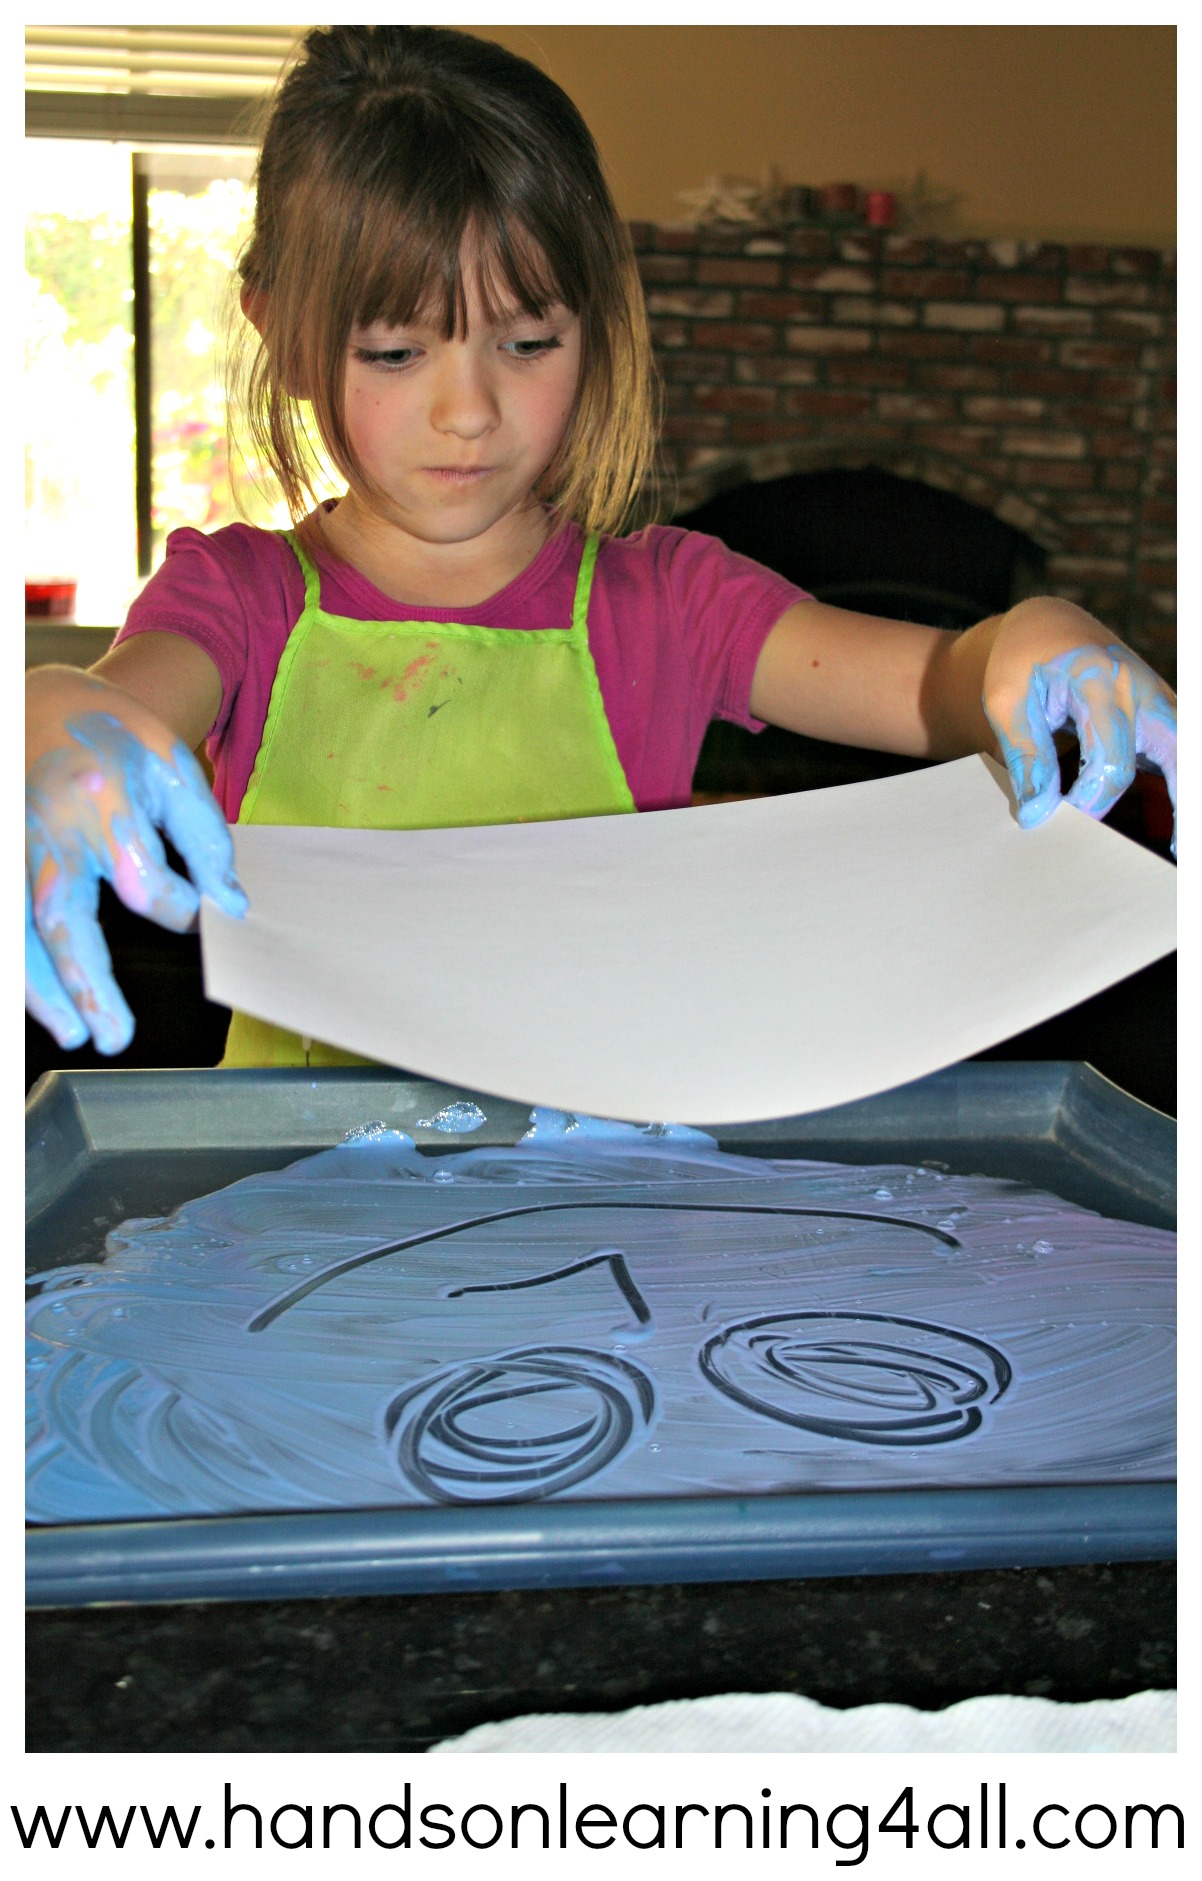
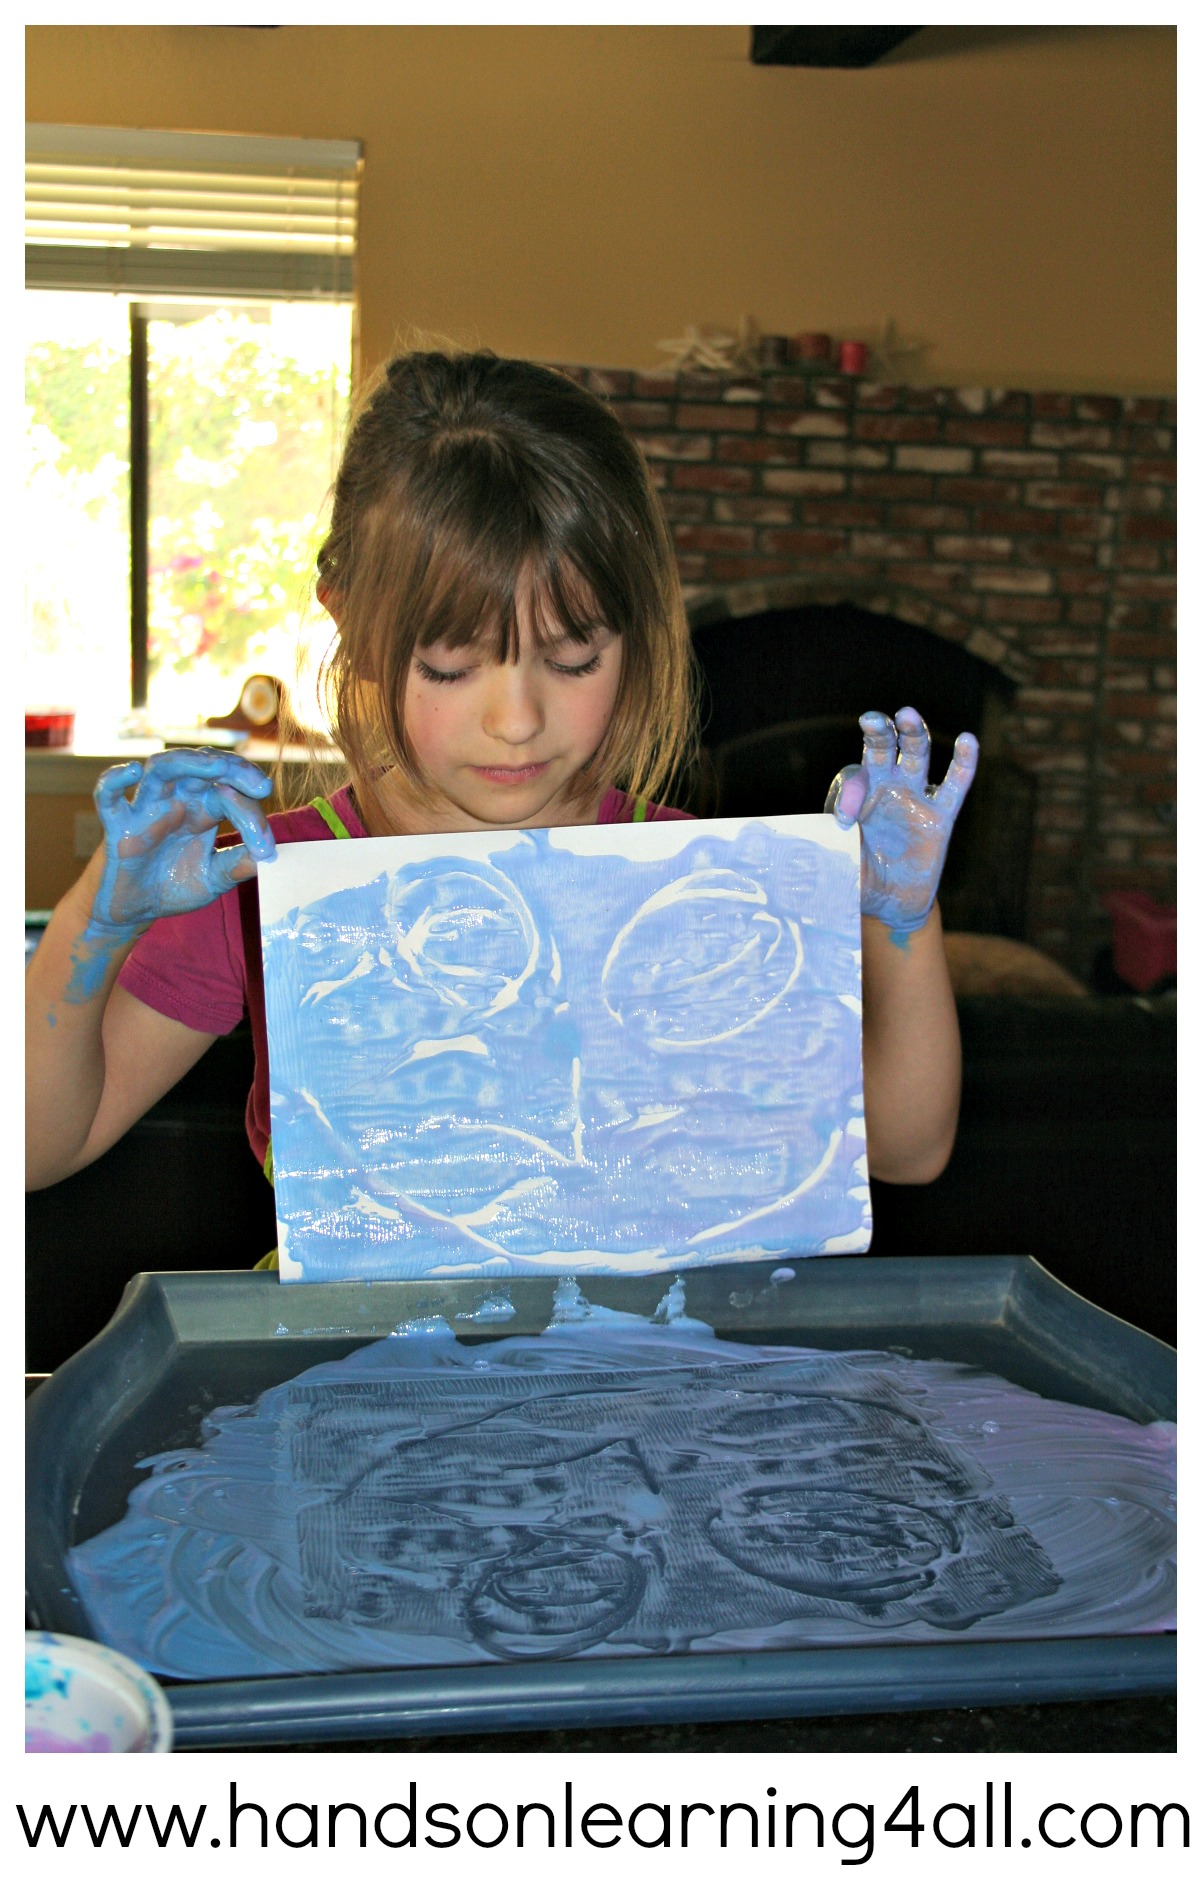
I decided to get out one of our plastic serving trays and put the finger paints directly on the tray. She enjoyed swirling the colors together. Next she used her finger to ‘carve’ a design of a face out of the paint. It was a really good face and she wanted to save it….so we decided to make a print out of it. She got a regular piece of construction paper and carefully put it on top of the paint on the tray. She barely pushed on the paper because she didn’t want the paint to ‘smoosh’ beneath the paper and lose her design.

Finger Paint Printing 2

She carefully peeled up the paper and she saw her print. Her brother began talking to her about printing in the ‘old days’ and how her art was very similar to the ‘old style’ of printing. She continued to print another copy of the face. Then she got more finger paint on the tray and made a new drawing.

Finger Paint Printing 3

This project was such a great tactile experience but also a great lead-in to learning about the history of printing. We looked up pictures on the internet of old printing presses and found some books at the library. Check out the links below!

jpeg

A link to the biography of Johannes Gutenberg: http://www.ducksters.com/biography/johannes_gutenberg.php

A link to the International Printing Museum in Carson,CA: http://www.printmuseum.org/

Tornado in a Bottle

Tornado in a Bottle

I lead a small book club for home-schooling students in my area. The book that we discuss at our meetings always comes from the Magic Tree House series by Mary Pope Osborne.

Mary_pope_osborne

This month’s book was Twister on Tuesday. It was an exciting tale about the main characters, Jack and Annie, and their magical trip to the past to visit a one-room schoolhouse on a prairie in the mid-west. During their trip they experience a twister (tornado) and save a group of students and their teacher by knowing about a storm cellar located below their school house.

jpeg

After our book discussion I plan an activity for the students that is relevant to the story. This time I planned the ‘Tornado in a Bottle’ activity.

Here’s how we did it:

Materials needed:
2 water bottles of the same size (one must be empty.)
1 washer that fits on the top of an open water bottle without falling through.
Duct tape
Food coloring (optional)

Assembly:
1. Place the washer on the top of the empty water bottle and fasten it down with two small strips of tape.
2. Carefully open the other water bottle and put a few drops of food coloring into the water. (Too many drops will make it difficult to see your tornado.)
3. Carefully place the empty bottle (with washer attached) on the top of the full bottle with the two openings facing each other. Make sure the openings are aligned.
4. Use the duct tape to tape the two bottle necks together. Use small pieces to get your alignment perfect. Then finish off with several large overlapping pieces to insure a leak-proof seal.

Directions for the Tornado effect:
1. Flip the bottle with the water to the top position by lifting your bottle set by the full bottle. (If you flip by holding the empty bottle your seal make break under the weight of the full bottle of water.)
2. Carefully give your top bottle (one with the water) a swirl by holding the necks of your two bottles with one hand and your other hand will move the top bottle in a fast circular motion. (If you don’t do this part the water will just ‘glug’ into the bottom bottle.)
3. The vortex or ‘tornado’ will form as the water moves from the top bottle to the bottom bottle.

Tornado in a Bottle 2

Why does this happen?
While the water wants to flow to the bottom bottle because of gravity, the air needs to flow upward toward the top bottle to fill in the space of the missing water. By swirling the bottles and creating the vortex, you have created the most efficient way for the water to flow quickly to the bottom bottle by swirling around the outside of the bottle while simultaneously allowing the air to move to the top bottle through the ‘hole’ in the vortex.

To complete the bottle assembly I grouped the students into pairs and they assembled one bottle set at a time. I distributed the duct tape in sections to each student set so the students didn’t have to fumble with tape and scissors while steadying the bottles for assembly. The entire project took less than 30 minutes for 5 student pairs to complete. The students really enjoyed swirling their bottles to create the ‘tornadoes.’ Some of the moms enjoyed watching the ‘tornadoes’ so much they continued to swirl them after the kiddos had run off to play at the park!

Here’s a link to the book, Twister on Tuesday: http://amzn.to/1mfIGnm

To learn more about real tornadoes you can visit this site: http://www.weatherwizkids.com/weather-tornado.htm

Make Your Own Kite

Make your own kite

There is something about kite making that is whimsical and fantastic. Ever since the first time we watched Mary Poppins together we have LOVED flying kites on a windy day. This year my daughter wanted to make her own kite just like the one in Mary Poppins. So we looked up a few ways to do it and got crafting.

518bsZvX-6L._SY300_

Step 1: We did not have a thin dowel rod, so we glued and taped a few Chinese Take-out chop sticks together.

Step 2: My daughter painted a design on a large sheet of craft paper and then we cut it into the traditional diamond shape.

Step 3: We lined up our chop sticks to extend through the center of our kite to the points and then looped string around all of the four sides.(We used butchers string for use in the kitchen but any sturdy string will do.) We folded the sides of the kite paper over the string and carefully glued and taped down the edges.

IMG_20140205_100854

IMG_20140205_100936

IMG_20140205_101217

IMG_20140205_101401

Step 4: We pulled the string that is resting on the tip of each chop stick tight and tied off the bottom of the string to complete the frame around the kite.

IMG_20140205_101953

Step 5: We taped the string to the chop sticks at each corner to secure them together and make a sturdy frame.

IMG_20140205_102433

Step 6: We tied a small loop of string on the center chop stick. This string serves as the attachment point for our long kite string.

IMG_20140205_102701

Step 7: We tied on a very long piece of fabric as the tail to the bottom of the kite. (We used an old sheet that we cut into strips. We started off with a 6′ kite tail but the kite spun in the air, so we added another strip of fabric and ended up using a 12′ kite tail to steady the flight of our kite.)

IMG_20140205_102827

I hope that you will sing “Let’s Go Fly a Kite” with your kiddos while you fly your homemade kites!

All About Frogs– A Reading Comprehension Set of 2 Matching Games and a Student Book

Frog set cover

We LOVE springtime at our house! We always try each year to raise tadpoles into frogs. (You can search on this BLOG to see some accounts of our attempts.) Last year was the first time we were able to collect eggs from a local stream and raise the little critters into frogs.

California Tree Frog May 2013

Watching the metamorphosis in person was incredible. My children expressed the emotions of parents when they watched those little eggs ‘give birth’ to those tiny fish-like tadpoles and then again as the tadpoles grew! When the little critters grew legs my kids became excited to learn more about the changes that were occurring. It was amazing to learn about the development of lungs in our tiny little friend’s bodies.

Finally when they grew into full-fledged frogs and they absorbed their tails my children also got to experience the feeling of ’empty-nest’ when we released them back into the wild at the same place where we collected the eggs. We will try again this year to collect some frog eggs! And along with our observations we will set up our science center with the two matching games I just created to review the facts we have learned about these wonderful amphibians!

Frog set

My All About Frogs Set includes 2 matching games (Total of 32 cards) and a 10 page student book. The student book is a non-fiction book containing facts about frogs including topics such as classification, diet, hibernation, metamorphosis and others. A teacher fact sheet about frogs is included. Teachers can review the facts with their students, students can read the student book and then play the matching games. The games are made to be self correcting so they are perfect as a follow-up in a learning center, in small groups, or for independent play! Common Core Standards Covered: RI.2.1, RI.2.3, RI.2.10, RI.3.1.

book (6)

I also have this 4D Frog Puzzle from Amazon.com that expands our frog learning center and takes the science learning to an anatomical level. We compared this model to a similar model of a shark that we have in our science collection and also discussed how our bodies are similar and different in comparison to a frog’s and a shark’s.

515JweYAn1L._SL1500_

Hands-on learning in science is a MUST! Try my All About Frogs:Reading Comprehension Set of 2 Matching Games and a Student Book to help your learners become more engaged in learning the facts about frogs!

Elephant Toothpaste: A Science Experiment to demonstrate an exothermic reaction!

Elephant Toothpaste

Elephant Toothpaste has been floating around the internet long enough for the Mythbusters to take notice and do a segment on it. (http://www.youtube.com/watch?v=FvGJ3LZbhDA&list=PL0A5590CEE7F2EC3B&index=3 Skip ahead to 1:55)

So what is this stuff? Is it really toothpaste for elephants? No…but this experiment does have a VERY cool reaction and can be used to demonstrate an exothermic reaction. Here’s the definition for an exothermic reaction: An exothermic reaction is a chemical reaction that releases energy in the form of light or heat. This experiment emits HEAT! Make sure that you exercise safety when pouring the peroxide into the bottle and with the chemical results while the experiment is occurring. After the chemicals have reacted completely the foam is just water, soap and oxygen so it is safe to touch and clean up by rinsing down the drain. YOU DEFINITELY DON’T WANT TO EAT THE FOAM! (Just in case you get any ideas of using the foam as real toothpaste….DON’T!)

Elephant Toothpaste2

Here’s the ingredient list:
•1 clean 16 ounce plastic/glass bottle
•1 clean pint sized water bottle (the smallest one you can find)
•1 tray
•1/2 cup 40-volume Hydrogen Peroxide Liquid (40-volume is a 12.12% solution, ask an adult to get this from a beauty supply store or hair salon)
•1 One Packet of Dry Yeast (about 1 1/4 tablespoons)
•3 Tablespoons of Warm Water
•1 Tablespoon of Liquid Dish Washing Soap
•10 drops of Food Coloring (your choice of color)
•Small cup
•Plastic Gloves
•Safety Goggles/Glasses

What to do:
***Place the bottle onto the tray–>this will help you clean up once your ‘elephant toothpaste’ has erupted!***
1. In the small cup mix the warm water with the yeast packet and set it aside for 30 second to 1 min.
2. Have an adult put on the gloves and the safety goggles. Measure and pour the hydrogen peroxide into the bottle. (Remember the bottle should be on the tray.)
3. Add the food coloring to the bottle.
4. Add the dish soap to the bottle and gently agitate the bottle to combine your ingredients.
5. Finally pour in the yeast/water solution. Do this quickly because your reaction will occur as a result of this step.

Take notes! The foam will begin to rise inside the bottle. You will begin to feel heat coming from the foam once it begins to flow from the bottle. The heat is a result of your chemical reaction and it is called an exothermic reaction.

Now formulate a hypothesis: What will happen if you use the smaller bottle for the same experiment. Try it. What happened? Were you right? Why or why not? Take pictures and write about your experiment!

My kids LOVED this experiment. If you can’t get the salon hydrogen peroxide, regular grocery store peroxide (for minor cuts, etc.) will work…your reaction just won’t be as powerful. This is a wonderful opportunity to get your reluctant writers to write about what would happen if you changed the amounts of the ingredients or used a larger bottle instead of a smaller one. The possibilities are almost endless.

Valentine’s Day Learning! Math Facts Practice AND Poetry!

Valentine's Day Post

Since I home-school I like to keep holiday learning light and fun! Today is Valentine’s Day and Friday so I decided to do a couple of craft projects for school today.

I have two children home-schooling with me. My son is in third grade and my daughter is in first grade. I could make two separate lessons but WHY do that when I can just differentiate the same lesson for my two learners!

Here’s what we did for math
V-tines Math Flip Flap Puppy
(Click the picture for a closer view.)

You have probably seen this cute little cut and paste Valentine’s Day puppy before AND we made him more interactive by adding addition (for my first grader) and multiplication (for my third grader) facts on the pieces. Then we made each piece a ‘flap’ by only gluing one edge down. Under each ‘flap’ we wrote the answers! Differentiated, math fact practice, Valentine’s Day craft fun! Yay!

Here’s what we did for language!
V-tine's Poem
(Click the picture for a closer view.)

We took the traditional poem:
“Roses are red.
Violets are blue.
Sugar is sweet
And so are you.”

And we used the beat and rhyme pattern to make our own poems about things that interest us. My son chose dinosaurs and aliens.

“Dinosaurs are real.
Aliens are fake.
Candy is good.
But you are a cake!”

Both my children learned a lot about beat and rhyme within poetry from this simple assignment which they thought would be VERY easy. It was a challenge to not use any of the original poem! First we mapped out the original poem on our white board to show which lines rhymed and which ones didn’t. Then we started brainstorming by developing the two rhyming lines. Then we filled in the other lines.

Who says school can’t be fun-filled and creative? Happy Valentine’s Day!

Complete Primary Winter Literacy Center Set

set layout

I love themed learning centers. With all of the snow that most of the nation is getting right now it is hard NOT to do a learning set that isn’t winter themed. So I created my Complete Primary Winter Literacy Center Set to offer 7 activities, games, and lessons for primary learners to explore language within a fun, colorful snow theme.

This set includes:

  • **The Snowman – an original story written by Veronica Stanley-Hooper
  • **3 Writing Prompts
  • **9 Story Sequencing Cards for “The Snowman” book
  • **16 Vocabulary matching cards
  • **1 Build a Snowman Following Directions Activity – 4 Tracing pieces and Directions Card

For a total of 30 pieces of literacy learning for center work or small groups!
All of the games are self-correcting and PERFECT for independent learning too!

Covers Common Core Standards:
CCSS.ELA-Literacy.W.1.1
CCSS.ELA-Literacy.W.1.2
CCSS.ELA-Literacy.W.1.3
CCSS.ELA-Literacy.L.1.4
CCSS.ELA-Literacy.L.1.4a
CCSS.ELA-Literacy.RL.1.2
CCSS.ELA-Literacy.RL.2.7
CCSS.ELA-Literacy.RL.3.7
AND
Key Concepts:
• To follow written directions in order to assemble a complete piece
of work.

This set is great for First, Second, or Third graders. You can find it on my Teachers Pay Teachers Store : http://www.teacherspayteachers.com/Product/Complete-Primary-Winter-Literacy-Center-Set-7-Language-Arts-Lessons-1051019

Winter Primary Writing Set – The Snowman – CCSS. ELA W.1.1, 1.2, 1.3

Cover tease Winter writing

My daughter LOVES to write in her journal and to do creative writing. But as part of the standard elementary curriculum students need to write for purpose too. I developed this set for both my first grader and my third grader to use to practice three different types of writing –an opinion paragraph, a narrative paragraph, and a sequential/informative paragraph.

inside book

The book tells a charming story of a group of children who make a snowman. When they go indoors for some hot cocoa the snowman makes a wish for a family. After drinking their cocoa the children return outdoors to continue building. They build a snow family and the snowman gets his wish! The book is written in child friendly prose with lots of high frequency words and the inside cover page of the book lists some words for review, so text is easy to read and understand. The story also serves as the basis for the three writing assignments included in this set.

WRITING SET

The set includes the book “The Snowman” written by Veronica Stanley-Hooper (me) and three writing prompts. The first writing prompt asks students to retell the story in their own words using picture clues that are printed next to the words First, Next, and Last. The second prompt asks students to offer a review of the story by answering the questions that are numbered in the directions. The last writing prompt asks students to write the directions for building a snowman in order using the sentence starter words: First, Next, Then and Last. The teacher should demonstrate or read examples of finished paragraphs before setting children off to write their own using the writing prompts in the set.

You can find the Winter Primary Writing Set – The Snowman at my Teachers Pay Teachers store here: http://www.teacherspayteachers.com/Product/Winter-Primary-Writing-Set-The-Snowman-CCSS-ELA-W11-12-13-1024761

Studying Crystals – Science, Art and Writing

Crystals

It’s wintertime and even though we live in Southern California we do like to study winter themes at this time of the year. So we have taken the past few days to study crystals. Here’s what we did!

Make Salt and Sugar Crystals

We boiled some water and I poured it into a beaker. Then we poured in salt to make a supersaturated solution. The definition of a supersaturated solution is a state of a solution that contains more of the dissolved material than could be dissolved by the solvent under normal circumstances. By heating the water and stirring vigorously we made the water dissolve A LOT of salt crystals (approximately 1c of water absorbed about 2c of salt!) We added salt and stirred the solution until stirring no longer made the salt dissolve and we could still see salt on the bottom of the beaker. Then we added a string of dental floss with a popsicle stick tied to one end and a small eyelet screw tied to the other. We placed the popsicle stick over the top of the beaker and dangled the floss down into the center of the beaker. Within hours we had salt crystals forming. We followed the same procedure for the sugar solution but the sugar crystals took a few days to form –so be patient.

81+JcIQFonL._SL1500_

Learn about Crystals

We watched two videos about crystals. One was “Meet Molly Cule” from the Magic School Bus Series Season 4, Episode 1. This one talks about the two main points (no pun intended) that we discussed during our salt/sugar crystal experiments–> Molecules and crystals! The kids in Mrs. Frizzle’s class create a car wash to meet a famous singer –>Molly Cule. While washing her car they learn about molecules and crystals!

We also watched a video from PBS called Cyberchase, Crystal Clear. This video talks about crystals and crystal formations in a fun adventure show format designed for children. You can find the video here: http://pbskids.org/video/?category=Cyberchase&pid=jgBoRUSoRLtNEX7pWW6EdD5haqnkbWUW There is also a fun follow-up video that talks about making sugar crystals or rock candy. You can find that video here:http://www.pbslearningmedia.org/resource/vtl07.math.geometry.sol.rockcandy/making-rock-candy/

x040123b025

We also read about snow crystals and saw some great pictures on this website: http://www.its.caltech.edu/~atomic/snowcrystals/class/class.htm The pictures are amazing and we learned a lot about the hexagonal shape of snowflakes!

Fun Follow-up

After we learned about the shapes and structures of crystals we decided to fold and cut a few of our own paper snowflakes. We used this website (http://www.origami-instructions.com/origami-hexagon-base.html) as a guide for how to fold an origami hexagon. Then we used our creative energy to cut some beautiful paper snowflakes!

Finally we found these fun polymer crystals that are super fun to play with and symbolically represent snow. They grow to 100x their original size.

71gOCb+hTBL._SL1500_

Even though they do not directly have a crystalline structure similar to snow, sugar, or salt crystals we found them a really fun way to conclude our learning about crystals!

91GCxRF3uZL._SL1500_

Using Game Chips and a Ten Frame to Teach Addition to 10 – Commutative Property – CCSS 1.OA.B.3

Game Chips Ten Frame

My first grader and I were working on math this morning and the picture on the workbook page we were ‘supposed’ to do had a picture of a ten frame with white and black colored circles on it. The task was to write addition sentences by drawing circles onto the ten frame and then writing the sentence for the picture.

othello game

I instantly thought of our Othello game. This game has chips that are black on one side and white on the other. So instead of writing on another piece of paper….we chose to play a game with these chips, a paper ten frame and a student sized chalk board.

31l8VTJKPDL

I simply folded a 1/2 sheet of colored paper into a ten frame and then we placed one chip onto each spot on the ten frame. We took turns flipping over chips and then writing the addition sentences that corresponded to the chips. What a fun way to practice the commutative property of math too. We took a look at all of of the addition sentences to see which ones had the same numbers in different positions.

Game Chips Ten Frame 2

Don’t have an Othello game? Check out this cool Ten Frame Set!

61B6YsM7vnL._SL1500_

We avoided another worksheet! Hooray!!! I hope you enjoy playing this game with your kiddos too!