Kid Entrepreneurs!

Maddie Bows2

I homeschool my three children. They are always coming up with new crafts and items to sell. So a few years back I decided to organize an entrepreneur day for some children in our local homeschool group. From this simple idea came many, many wonderful and exciting new products. The children that attended sold cookies, purses, toys, jewelry, bows and so many other great things.

One child in particular took her idea for a booth at our little entrepreneur day and turned it into a money making business with a goal in mind. She wanted to earn enough money to send herself to cheer camp. AND guess what===> she did!!!! I recently interviewed this young entrepreneur about her business with the hope that her story may inspire the inner entrepreneur in your children.


HOLFA: What is your business and your business name?

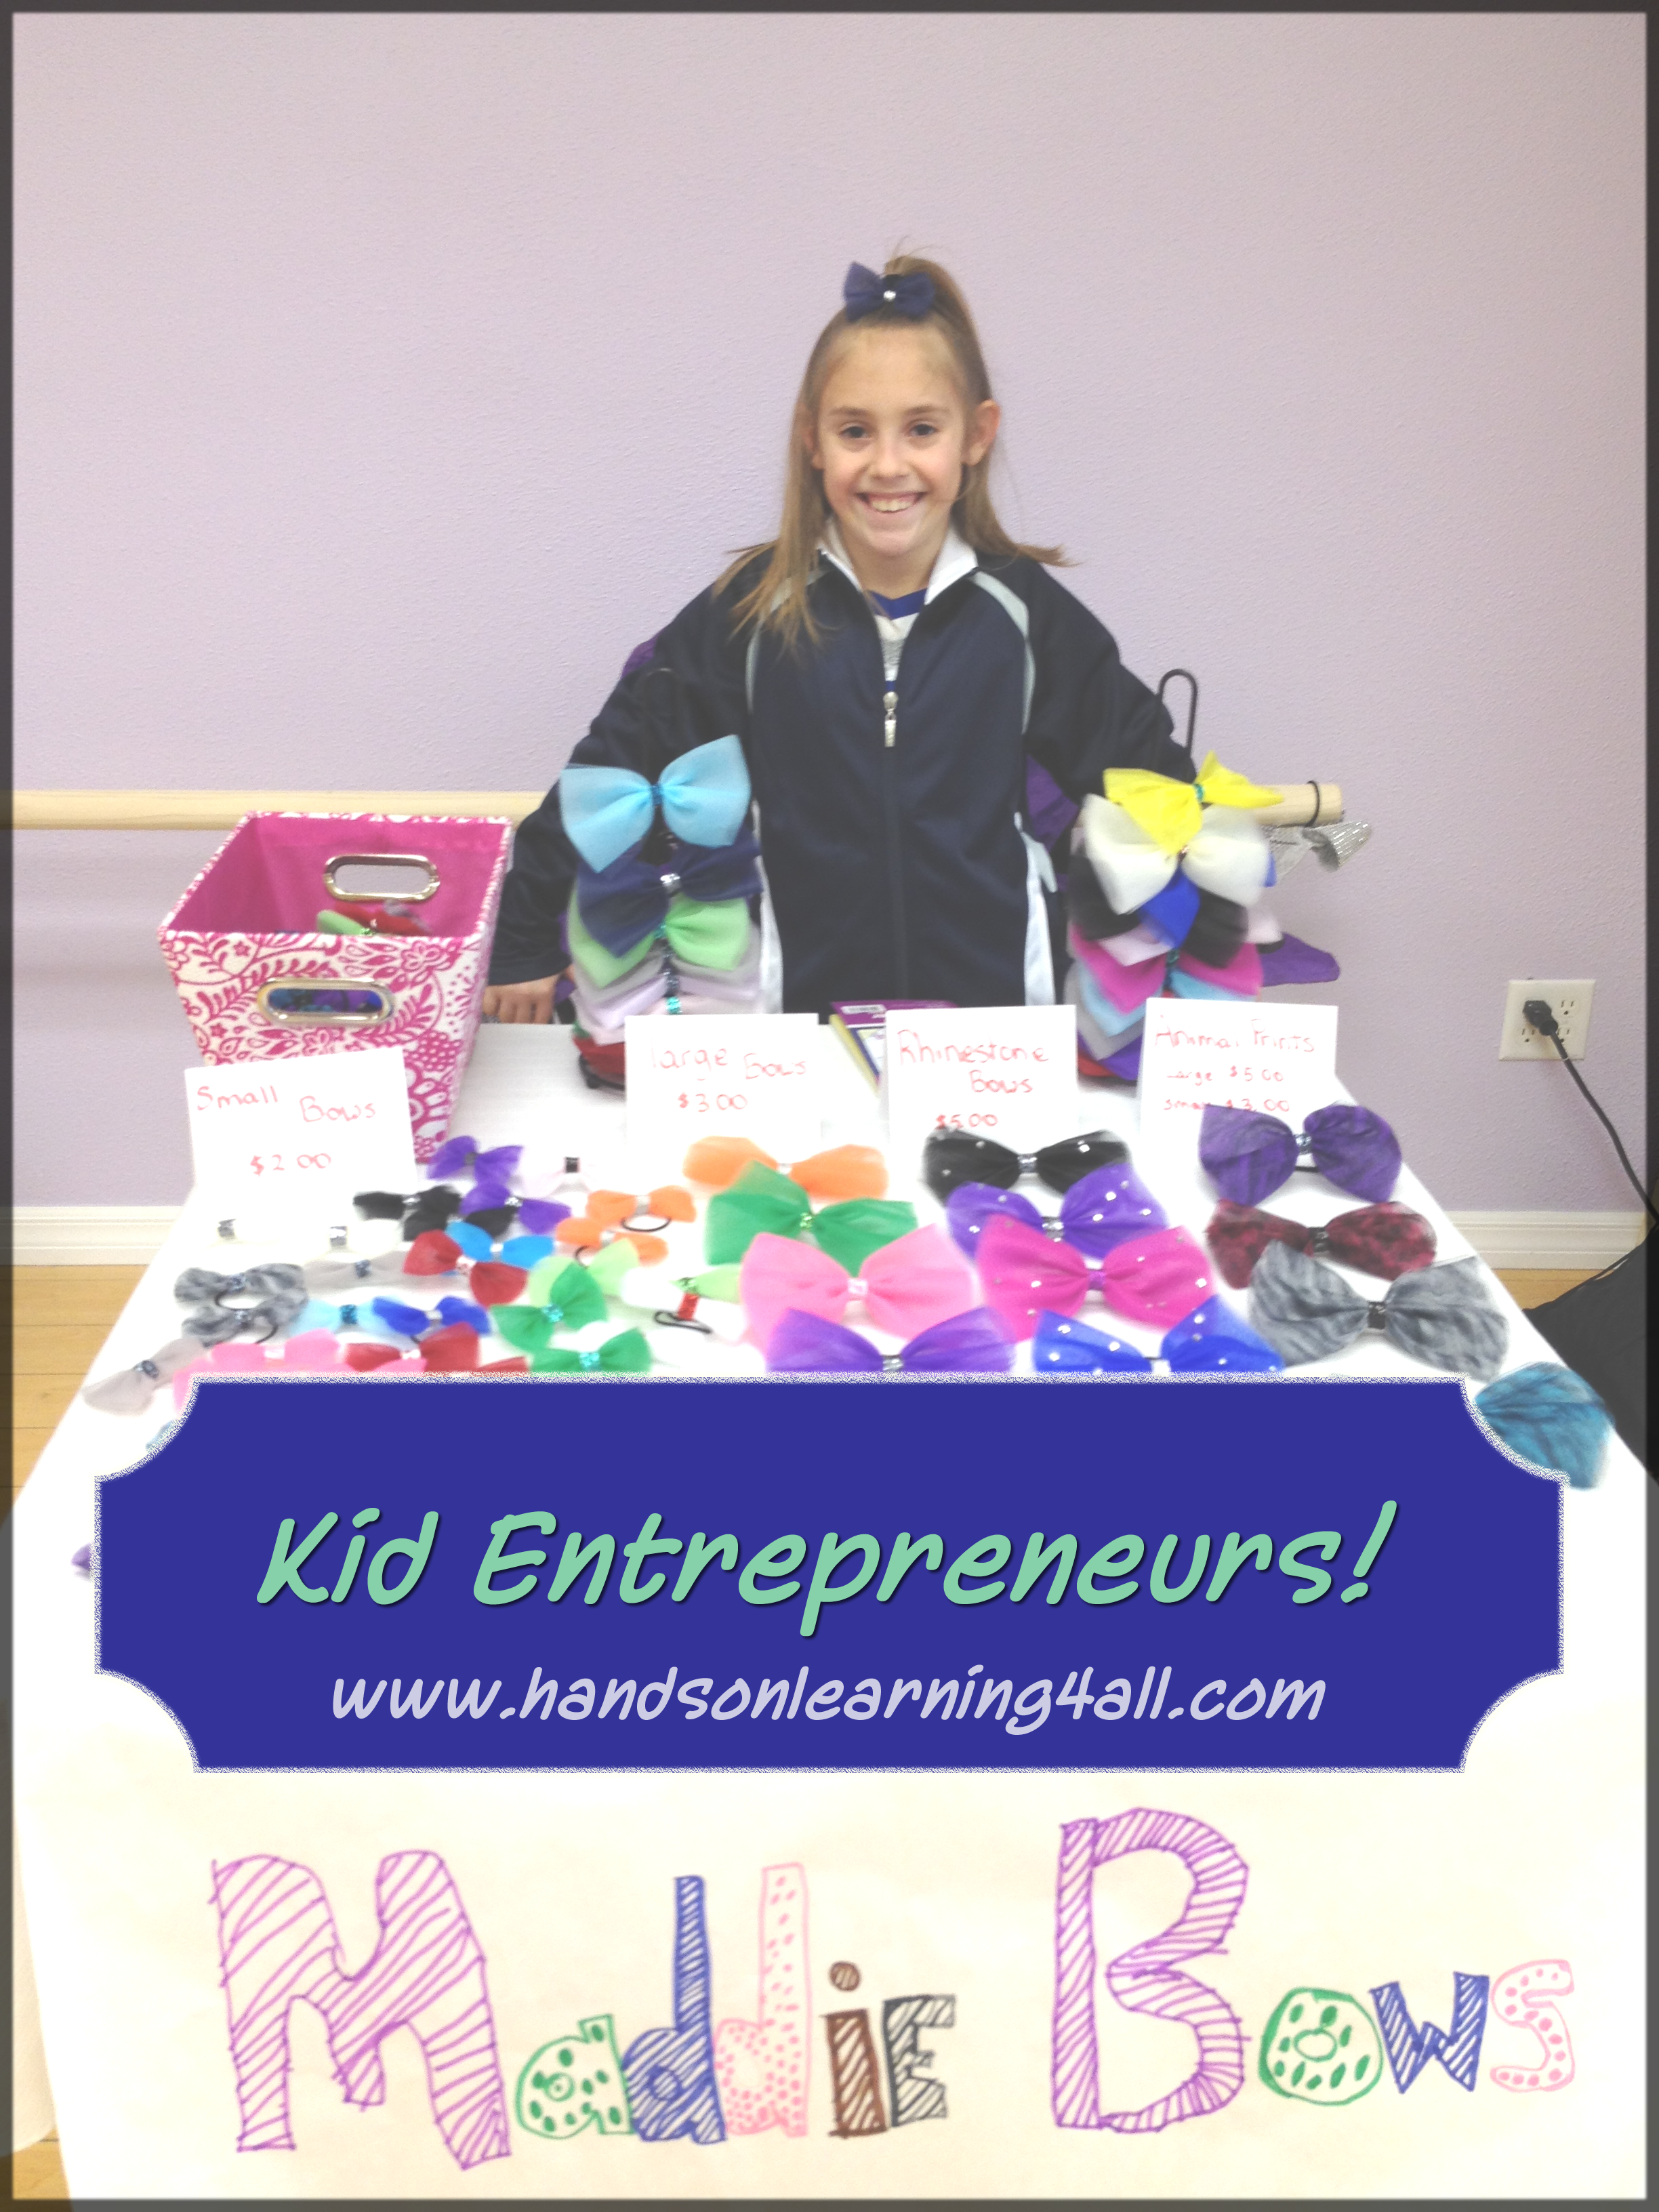
Maddie: My name is Maddie Waschak and I am 10 years old. I hand make and sell hairbows attached to rubberbands or barrettes. I mostly make my bows out of tulle, but I also use ribbon and rhinestones. My business name is Maddie Bows!

HOLFA: How did you get started in business?

Maddie: I first got the idea when Ms. Veronica decided to do an entrepreneur fair for home-schoolers. I know a Mom that makes really pretty cheer bows and I thought maybe I could make some bows of my own for the fair. I was so excited when people liked my bows!

HOLFA: How did you learn to manage the money for your business? Are you saving for anything?

Maddie: At first my Mom bought me all the supplies I needed, but when I started making money she told me that I would have to use my profit to buy more supplies. At first it was hard to spend my money on supplies but I learned how to price my product so that I could buy supplies and still make money. I have a special wallet that I keep all my money in; I also use it to make change for people who buy my bows. When I get too much money in my wallet my mom takes some and puts it into the bank. I wanted to save up enough money to pay for a really expensive sleep away cheer camp this summer.

HOLFA: Do your family members help you? How?

Maddie: My family sometimes helps me. The really tiny rhinestones are hard for me to apply so my mom puts those on. She taught me how to use the glue gun and checks to make sure that all my bows are selling ready. My brothers have helped me by going to events and taking turns sitting in my booth to sell bows when I can’t be there the whole time. Sometimes I will get orders when I am busy with school or gym or other stuff and my Mom always say school comes first. She sometimes helps me fill orders so I won’t miss out on other important stuff. My friends and cousins also help me come up with new ideas and help me make bows.

HOLFA: How do you see the future of your business?

Maddie: My brother wants to open an ETSY store for me and get me my own website. I would love to start selling my bows at stores and online. Right now I have someone who is helping me get started doing craft fairs and boutiques.

HOLFA: Do you have anything else you want to share?

Maddie: I managed to raise almost $600 this year and I was able to pay for my sleep away camp with a little help from my Mom. I can’t wait to go!! I have learned a lot this year from my business. I learned that making money is not easy and you have to spend money to make money and it takes lots of work.


I hope that sharing this interview with you has inspired you to listen to the entrepreneur waiting inside your child. Children are capable of being business owners and in some ways they are better at taking this leap into the unknown because they are natural risk takers. As adults we have too many responsibilities to take a risk with our career and income. But as children they have nothing to lose and EVERYTHING to gain. Successful entrepreneurs will tell you that it has taken a lifetime of mistakes and failures to get where they are. Why not start as a child?

Activity Ideas Using Books as Inspiration!

I love reading books with my kids! Something just feels right about snuggling up and reading a good story. After the story we both feel like there should be something else that we do together. So here are a few of our favorite follow-up activities. You can do these or use these as ideas to create your own. Either way it will be double the fun from the same book!

Viking Ships at Sunrise by Mary Pope Osborne

Activity Ideas-Book Inspired

This book inspired activity will be especially intriguing to kids from 5-8 years old. We used floral foam and popsicle sticks to carve out our own viking ship figureheads. Start with a small block and a picture of something you want to carve. We used the cover of the book as inspiration. Start with a drawing of the figure on the front face of the block and work backward. Again, perfection isn’t important here. Your children will be developing critical visual thinking skills and having fun at the same time. Be sure to do this activity outdoors as the floral foam can get messy.

The Very Hungry Caterpillar by Eric Carle

Photo credit: http://pinterest.com/pin/343258802819169275/

Photo credit: http://pinterest.com/pin/343258802819169275/

This book inspired activity is great for kids of all ages but toddlers will gain the most from it. The fine motor muscles of your toddler/preschoolers fingers and hands will get a work out poking the grapes onto a skewer, squishing cream cheese out of a piping bag, and poking mini-chocolate chips for the eyes onto these critters. Be sure to use the whipped cream cheese and a homemade piping bag (from a ziplock sandwich bag and zip the top closed) for maximum success. Remember perfection isn’t necessary here because these caterpillars will be delicious no matter what they look like AND lots of fun too!

The Indian in the Cupboard by Lynne Reid Banks

Photo Credit: http://pinterest.com/pin/343258802819221851

Photo Credit: http://pinterest.com/pin/343258802819221851

This book inspired activity is great for older elementary kids from 8-11 years old. Using popsicle sticks soaked in water, dental floss, a moderately sharp cutting tool (AND a little help from parents here), and Q-tips as arrows your kids can make a really cool bow and arrow set. Click on the picture to follow the link to Pinterest for full directions. My kids LOVED using these and even set up a mini target for aiming their bows and arrows.

I hope that this post has inspired you to read with your kids and to get them creating some book inspired activities. I would love to hear about the great things you come up with!

Five Fun, Favorite Activities!

A whole week ahead of you with your kiddos and nothing to do? Here are some ideas to get you motivated. Many of these cost little or no money and are guaranteed to strengthen your relationship with your kids. Have fun and enjoy your time!

1. Play the Dress Up Game!

5 activities
This game is so much fun. You grab a bunch of play clothes (or old clothes) and a timer for play(you determine the time based on the players. Older kids less time, younger kids more time.) Set the timer and everyone works together to dress one person up in a unique way. Use a shirt as a hat or a wig. Use pants as pig tails. When the timer goes off admire your ‘creation’. Take turns so that everyone gets a chance to be the model! This is a great party or camp game too! You can even play it as a competition with judges that give prizes like “The Most Creative Use of a Clothing Item” and “I Would Actually Wear this.” Be sure to have your camera ready because this game produces GREAT pictures!

2. Draw outdoors

Photo Credit: Santa Cruz Museum

Photo Credit: Santa Cruz Museum

Get a different perspective on art and the outdoors. Take crayons, water color paint, chalk, or just pencils outside and draw something. Show your kids pictures of Georgia O’Keeffe’s work from this website. Or go to the zoo and draw some of your favorite critters. We have a zoo membership to the LA Zoo and my kids love to take their sketchbooks there and just visit a few animals and draw. People stop and comment on the beauty of their work. Noticing the beauty of nature and the natural world has a calming effect on my kids and I love the discussions we have. I bet you will too!

3. Build a Fort

Photo Credit: http://pinterest.com/pin/343258802819169238/

Photo Credit: http://pinterest.com/pin/343258802819169238/

Whether you use sticks from outside and a blanket to make a teepee or the cushions from the couch, making a fort is always a good time. Kids LOVE to pretend that they are camping or adventurers. We recently built a fort with newspaper. Just tightly roll a sheet of newspaper and tape the end. Then attach another rolled tube to the first tube with tape. (We used masking tape.) Making triangles is the easiest way to build a solid structure. Before we knew it we had a building with a roof. We taped flat sheets of newspaper to the ‘roof’ and made a cool fort. The kids used it as a dog house, a camping tent, as a prehistoric cave, as an alien outpost…they used it until it fell down. It was a ton of fun!

4. Play with Ice!

Photo Credit: http://pinterest.com/pin/343258802819159282/

Photo Credit: http://pinterest.com/pin/343258802819159282/

My kids LOVE this activity! When we do this we freeze a lot of containers with ice. Cups, plastic shoe boxes, and yogurt containers. By the way, the plastic insert in the Qtip packaging makes great bricks! Then they take their ice blocks and go outside and play. We have played hockey in the driveway with some of the round ‘puck’ shapes. We play archeologist with the ice that has frozen creatures in it. We build igloos with the brick shapes. This activity is great on a hot summer day.

5. Play Blanket Ball!

http://metoo.clubspaces.com/

Photo Credit: http://metoo.clubspaces.com/

Get a blanket or sheet and use it like a party parachute. Have your children grab the ends and bounce a ball on top of it. See how long you can keep the ball on! Or if you have a large group of children you can make two groups each with their own blanket and try to pass the ball between the two groups. We have played this as a birthday party game but I can see it as a team building activity for a scouting group too.

These activities are sure to keep you and your kiddos busy for hours and best of all you will have a great time doing them. Make sure you have a camera handy because you will be making memories!

Activities that Keep Your Children Entertained for Little or No Money

We all have those days where we just need to get stuff done. Whether you have to do a bit of work at home, pay the bills, or clean the oven—it’s a job that the kiddos just cannot help with. But children have an uncanny sense for this type of adult activity and seem to NEED you when you need to get your stuff done. Here is my solution to that problem. I have standby activities ready for this moment that will help you get your work done while your kiddos are playing happily.

Beanbox

IMG_20130521_174641

IMG_20130521_174632

This activity is just as easy as its name. Pour some dry beans into a large box with some trucks, scoops (old laundry detergent lids work well), spoons and whatever else you think of. I use an under the bed storage box and then I save the activity by putting the lid on the box.

Toy Washing

6836888934_f7d826eb60

This one is great for the summertime and outdoors. Just put your children into their bathing suits. Get a big tub or kiddy pool and put some toys in with some dish soap and washcloths or sponges and let them play.* Set the wet toys in the sun to dry and you have clean toys AND happy kids!

Cardboard Shoebox

Model of the Natural History Museum

Model of the Natural History Museum

Give them markers, bits of old carpet, wall paper, dolls and toys and let them make a house, or museum, or another planet!

Pots and Pans

IMG_20110817_100303

I think this one explains itself. Add some table cloths and a play table with dishes and napkins and they can make a restaurant. I know they have play toys that are pots and pans but using your stuff is more fun! Sometimes I even take the pots and pans to the bean box and they have a BLAST!

Mixing and Pouring

My daughter is doing her Kitchen Chemistry while I get dinner prepared!

My daughter is doing her Kitchen Chemistry while I get dinner prepared!

Here’s my BLOG post on this activity that I use as a stand-by when I need to get some cooking done and the kiddos can’t help.

Building Sticks

IMG_20130515_091609

Home Depot and Lowes offer FREE paint stir sticks. Next time you are working on a home improvement project and you need a little time to get some stuff done, grab a few paint stir sticks. While you are working on your project they can ‘work’ on theirs!


*Warning- anytime your children are using water you should keep them in your view. A child can drown in an inch of water.

Mixing, Pouring and other ‘Childish’ things!

My daughter is doing her Kitchen Chemistry while I get dinner prepared!

My daughter is doing her Kitchen Chemistry while I get dinner prepared!

When I was a kid I loved going into the bathroom (of all places) and mixing products together like a scientist. My sister and I would use dixie cups from the bathroom and mix toothpaste, baby powder, water, baby oil, lotion—anything we could get our hands on—in those cups to make potions.

Guess what? My sister is a scientist for a pharmaceutical company today, and I love cooking in the kitchen! So what does that mean? You have probably heard this a million times but I am here to repeat it to you….playing is work for kids. Kids really need to mix, explore, and get their hands dirty every day! AND when they do, you will see magic happen. My six year old is using words like ‘dissolve’, ‘solution’, and ‘incorporate’ as she mixes random ingredients from our pantry closet.

To get them started just start saving things that you won’t need anymore. Ingredients from a recipe that didn’t work out and you will never try again. Or give them inexpensive ingredients like flour, salt, and sugar to work with. Save these ingredients in a special cabinet or drawer that they can access when they want to do kitchen mixing. (We call it mixing without tasting.) I even bought my kids special measuring cups and spoons for this activity, but you don’t have to. Just make a rule that they have to ask you for the stuff they can use (to make sure they don’t use every measuring cup you have while you are trying to bake a cake!)

This is me---cooking dinner while my daughter is doing her kitchen mixing! (She took the picture!)

This is me—cooking dinner while my daughter is doing her kitchen mixing! (She took the picture!)

Not only is this a great activity to keep them busy while you are cooking, but it is also a great way to get them thinking about science, cooking, language, and math. I give my children measuring spoons and cups and pieces of paper and pencils to write down their recipes. Anything they can practice as a child may become a career later in life. So get your children playing—-I mean working!

Clean up is part of the game!

Clean up is part of the game!

Plus the clean up is also a part of the activity. They pretend they are real parents cleaning up the kitchen. My kids LOVE this activity and can do it for at least an hour. Definitely enough time for me to get dinner prepared and my work space cleaned up! Yay! What can you do with an hour of time?!

Cardboard Boxes = Big Fun

Something about a fresh cardboard box that drives my kids crazy with creative energy! They LOVE the endless possibilities of what this blank canvas can become. Will it be an airplane? a museum? a time machine? a dinosaur cave?

Two knights ready for battle!

Two knights ready for battle!

I always help them cut the holes, doors, windows, etc. because cardboard can be stiff and little hands have a hard time cutting it, but I let them draw the lines on which to cut! It is very hard not to let my perfectionist out at this point because I have a strong need to straighten lines and round curves….but I resist the urge because the finished piece is totally their work when it is all finished.

Model of the Natural History Museum

Model of the Natural History Museum

Whatever it is that your child wants to create with his empty box, I am sure it will be a great invention. Just don’t tell the person who gave him the present that he liked the BOX more than the present!

We have these boxes to build with at our house. My kids love to build these and use them to make mazes too! They even made an obstacle course for our dog with them!

A Diplodicus built with cardboard blocks, cardboard box, brown paper, and broom sticks!

A Diplodicus built with cardboard blocks, cardboard box, brown paper, and broom sticks!


Check out the directions for this dino on my Fun Projects page!

Make your own ‘Flubber’– it’s like silly putty!

Flubber is a fun, putty-like substance that is different than regular play dough. It flows and moves but it is not as liquid as slime. You have to give this stuff a try. It is super easy to make and my kids LOVE to play with it. BONUS–there is a lot of science that can be discussed with this stuff!

Playing with Flubber!

Playing with Flubber!

I used this recipe from Food.com

  • 1 1/2 cups warm water
  • 2 cups white glue
  • food coloring (I didn’t use this)
  • 1 1/3 cups warm water
  • 3 teaspoons borax

Directions:

  1. In one container mix 1 1/2 cups warm water, white glue and a few drops of food coloring.
  2. In a second container mix 1 1/3 cups of warm water and Borax.
  3. Mix the Borax mixture into the glue mixture until combined. (may be some liquid in bottom of container).
  4. Place Flubber on a tray and let stand for a few minutes before playing with it!
  5. Store in air tight container.

Read more at: http://www.food.com/recipe/flubber-134095?oc=linkback

You can use the extra borax in your laundry. Works wonderfully on whites! (I tested this out because we bought the extra big box of borax for our Flubber too!)

Science of Flubber: It’s not just for little kids!

Definition:
Flubber is a polymer. Polymers are very long chains of repeating molecules. A chemical reaction between the polymer from the white glue (polyvinyl acetate) and the borax (borate ions) causes the molecules to link together in a 3-dimensional configuration creating FLUBBER!

Properties
“Flubber is a non-Newtonian fluid that flows under low stress, but breaks under higher stresses and pressures. This combination of fluid-like and solid-like properties makes it a Maxwell solid.” (Quoted from “Wikipedia”)”

Well that’s all well and good but does it help us learn anything?
I recently used Flubber at a book club meeting to visualize glacial flow. Flubber acts a lot like glacial ice. When it is cold it flows slowly. When it is warm it flows quickly. When you pull at it quickly it shears–just like when glaciers fall off a cliff into the ocean. (See the first source below for more information on demonstrating glacial flow with Flubber.)

Another use for flubber in teaching is to demonstrate a chemical reaction. By combining two different elements you can create a completely different substance.

Here are a few everyday objects that are made with polymers:

  • anything plastic
  • proteins, such as hair, nails, tortoise shell
  • cellulose in paper and trees
  • DNA
  • silly putty
  • rubber
Flubber is fun for adults and kids!

Flubber is fun for adults and kids!

I hope that you will find time to make and play with Flubber with your kids. My husband has been playing with flubber with my daughter the entire time I have been writing this article. PROOF that it is as fun for adults and children to play with! Enjoy!


You can buy the Magic School Bus Polymer Lab from Amazon and help support Hands On Learning 4 All.com


Sources:

Spring Break Activity: Tessellations

A tessellation is a shape that is repeated over and over again covering an area without any gaps or overlaps. One of the most famous artists who created tessellations is M.C. Escher. You can see one of his tessellation pieces below.

Taken from http://www.mcescher.com/

M.C. Escher --Tessellation

M.C. Escher –Tessellation

Below is a sement from Cyberchase –a television show on PBS:

Start at 3:31 for the segment on Tessellations:

    For the full video: http://pbskids.org/go/video/?pid=auo60NBX2y1WrxRd9zb9Y2kwnRBhRhV7&category=Cyberchase

    The video segment explains how to make the template. My children usually take their templates outside to the driveway and then make their tessellations with sidewalk chalk. I hope that your children will enjoy making tessellations too!

    Making a Tessellation with Chalk

    Making a Tessellation with Chalk

    Finished - repeated 4 times!

    Finished – repeated 4 times!

    My 4 yr old completed a Tessellation with Pattern Blocks!

    My 4 yr old completed a Tessellation with Pattern Blocks!

A Spring Break Activity for Your Kids: Science that POPS!

Spring Break is a great time of the year. The kiddos are ready for a break from school and the weather often permits them to get outside and have some fun. But do your kids want to just watch the tv or play video games? This drives me crazy. My son LOVES his Wii but we have to regulate his time or he would play it forever. Sometimes (even with the hundreds of toys that we have) he says, “I’m bored.” So I have to stimulate his creative thinking with a high interest activity. The activity below worked for all of my children. They got so excited they wanted to do many tests to see which one worked the best and produced the biggest ‘pop’.

Volcanos and Chemistry:

Chemical reactions are fun. It’s like a bit of science magic. This experiment uses household items from your kitchen to create a safe non-toxic reaction.

Our Test Bags: Baking Soda Tablets and Vinegar="POP!"

Our Test Bags: Baking Soda Tablets and Vinegar=”POP!”

Here’s what you will need:

  1. Baking Soda Tablets (alaseltzer or generic): Sodium Bicarbonate – 4 Tablets
  2. White Vinegar
  3. Water
  4. Ziplock Bag

Directions:

  1. Open the Sodium Bicarbonate Tablets and stack them.
  2. Open the ziplock bag and pour in about 1″ of vinegar.
  3. Carefully pinch the tablets inside the bag near the top, but do not allow them to fall into the vinegar.
  4. Zip the bag closed ( you will need a partner to help you ) but do not drop the tablets into the vinegar
  5. Drop the tablets and shake the bag 4-5 times fast. Then put the bag down and move back at least 5 feet.
  6. The bag will fill up with gas and pop when it can no longer hold the gas that the sodium bicarbonate and the vinegar create.

What Happened?

Vinegar has acetic acid and its chemical formula is CH3COOH. Sodium Bicarbonate or Baking Soda’s chemical formula is NaHCO3. The reaction between the two compounds looks like this CH3COOH + NaHCO3 -> H2O + NaOCOCH3 + CO2. Everything past the arrow is what is left after the reaction. If you wait until your bag is completely liquid and no more bubbles are produced you can sniff your results. (Pour the remaining solution into a cup and smell it.) It should smell like salty water. H2O is water. NaOCOCH3 is a salt known as sodium acetate. CO2 is carbon dioxide that is the gas you saw fill the bag and the bubbles you saw forming.

volcanodiagram

How does this relate to volcanoes?

Volcanoes are mountains or hills that are typically cone shaped that have a vent in the earth’s crust through which lava, steam, and ashes are expelled. The pressure builds up below the earth’s surface. When the pressure gets very high the hot melted rock called magma travels up through the conduit (or pipe) and breaks the surface of the volcano often filled with rock and/or water. The great explosion releases the magma which flows down the side of the volcano mountain. As the magma cools down it turns back into solid rock.

Your bag filled up with pressure from the chemical reaction of the baking soda tablet and vinegar and eventually ‘popped’ like the volcano explodes from the pressure of the hot magma. Pretty cool, huh?

Want a few books to read to go along with your Volcano activity?


Come back soon to see my next spring break activity!

Milk Crate Seats (and Storage)

Milk Crate Seats

DIY Milk Crate Seats

Here is a tutorial on how to build your own milk crate seats. I have seen these done all over Pinterest but no one has a good tutorial on how to actually get it done. So I thought I would show you how I made mine. It is really very easy and if you use your buyers knowledge and find inexpensive materials each one will cost you under $10. I had the crates, particle board, and the quilt foam sheeting so three crates only cost me $15. (My fabric was $7 per yard.)

Materials:
1/2″ MDF or Particle board cut to the size of the inside ‘lip’ of your milk crate.
Staple gun and staples
Foam sheet for quilting
Pillow stuffing foam
Fabric (if you are only doing one crate 1 yrd will be plenty. I did 3 crates and used 2 yrds of fabric.)

Directions:
1. Measure the inside ‘lip’ of the crate. This is where your cushion will rest and create a seat—AND storage later. Either cut your MDF or particle board or have it cut for you in the dimensions you measured. A little smaller is better than a little bigger because you will be adding a little thickness with the foam and fabric later
2. Cut your quilt sheeting just a little bigger than your board.(Remove board for next step.)
3. Rest your pillow stuffing on top of the quilt sheeting and wrap the pillow stuffing in the quilt sheeting. We will call this the ‘pillow top’.
4. Begin stapling the corners of the pillow top to the board.
5. Cut fabric a bit bigger than the board with pillow top. (You will want enough extra fabric to fold over the raw edges before you staple the fabric to the board.)
6. Fold over fabric raw edge and begin stapling in the center of one of the sides.
7. Work around all of the sides in the same fashion.
8. Pinch together corners of the fabric and staple the corner. Then tuck the extra fabric from the ‘pinched fabric’ into the folded side and staple again. (See photos) Work around until all corners are stapled. Staple around the fabric edges until none of the fabric is loose.
9. That’s it! Just fit your finished top back onto the crate and you have a crafty seat that is also storage. I am using this in my homeschool classroom but I can see these in a kid’s room for a reading area too.

Photos:

Measure inside lip

1. Measure inside lip

2. Cut Quilt sheeting

2. Cut Quilt sheeting

3. Center Pillow Stuffing.

3. Center Pillow Stuffing.

3. Wrap Quilt Sheeting.

3. Wrap Quilt Sheeting.


4. Wrap and staple corners.

4. Wrap and staple corners.

4. Staple corners.

4. Staple corners.

5. Cut fabric larger.

5. Cut fabric larger.

6. Staple fabric in the center of each side.

6. Staple fabric in the center of each side.

8. Pinch together corners and staple.

8. Pinch together corners and staple.

8. Tuck extra fabric and staple.

8. Tuck extra fabric and staple.